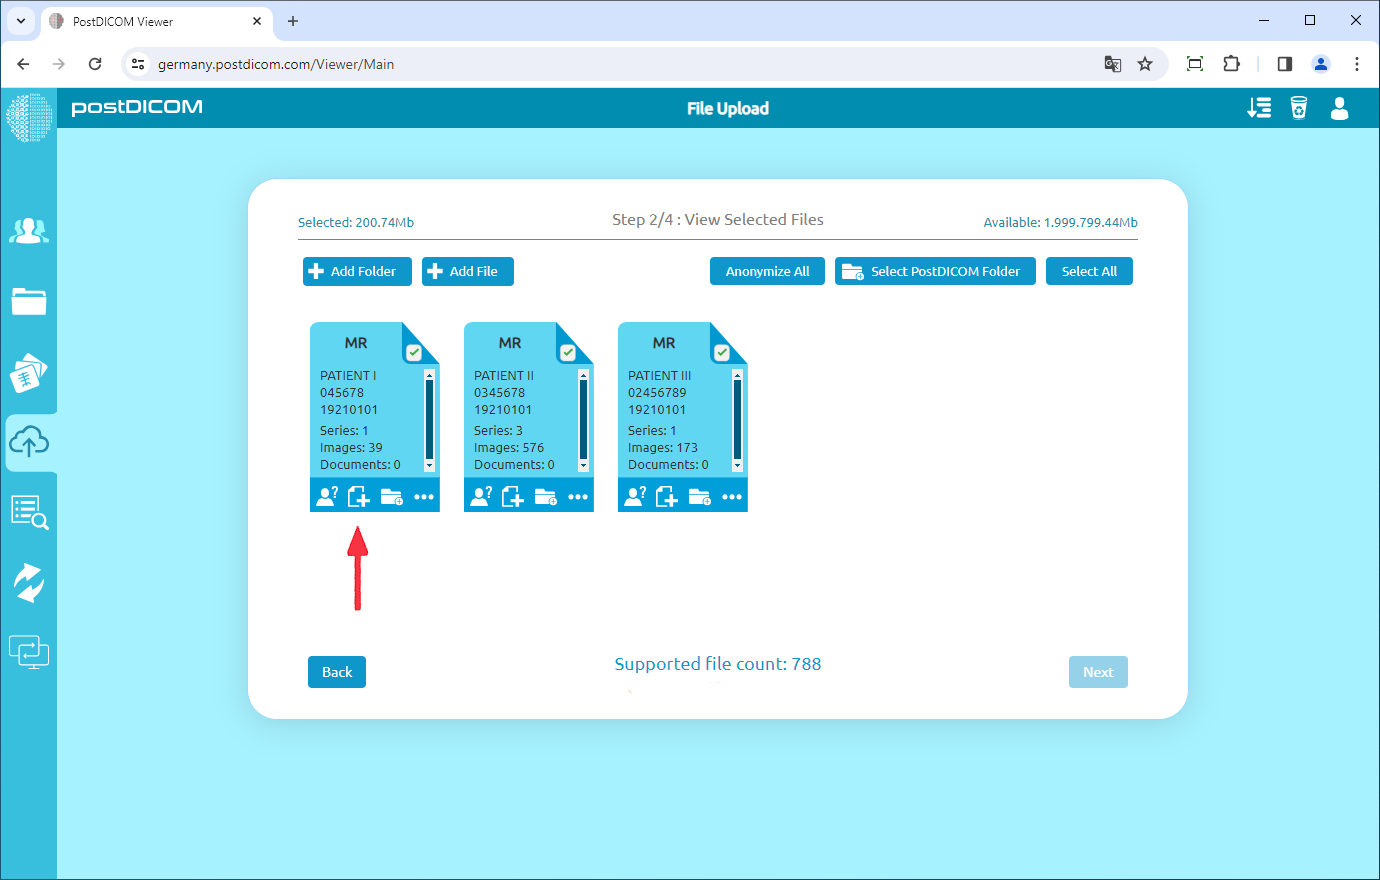
On "Step 2/4: View Selected Files" page, you will see all Patient Study Previews. At the bottom of each patient study preview, there are 4 buttons namely anonymize, add clinical documents, assign study to a folder and show study details. In order to add clinical documents to a patient study, click on "Add Document" icon.
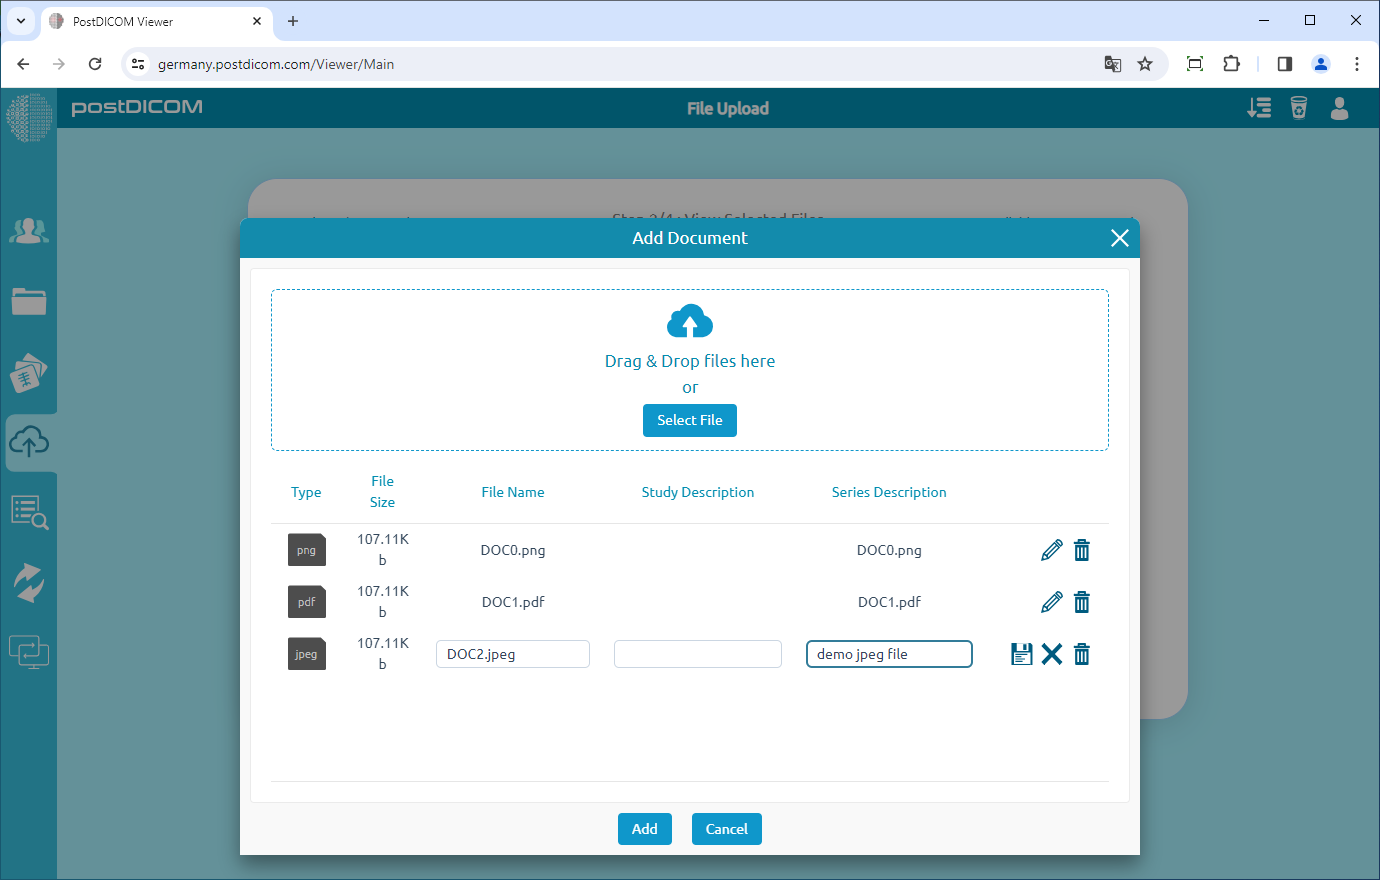
After clicking on the "Add Document" icon, document selection form will be shown. On that form, click on "Select File" button to add a document. Supported file types are MP4, AVI, PDF, BMP, PNG, JPEG and JPG. After selecting the documents you want to upload, the documents will be listed as shown below. You can change the name of file or add file description by clicking on the pencil shaped icon on the right side of the document info. After you added the file description, you can save it by clicking the disk shaped icon or cancel it by clicking on cross icon. Documents can be removed from list by clicking on recycle bin icon.
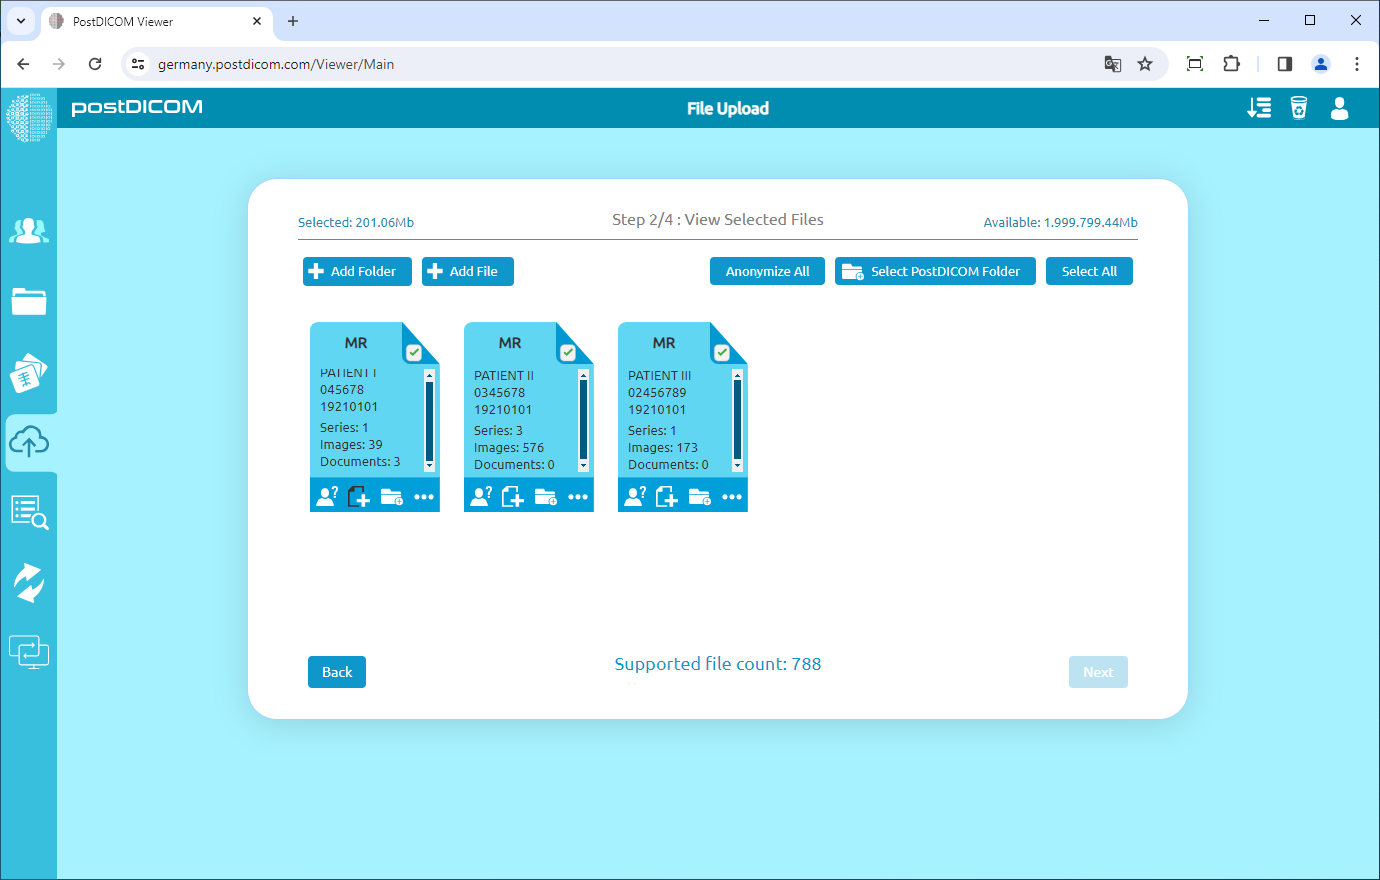
Once you have added all documents and made edits you want, click on "OK" button to save them. "Add Document" icon which was previously white will turn into black color indicating some documents will be uploaded with that patient study.
In this way, you can add any clinical documents to any Patient Study before uploading to postDICOM cloud.